To build a personalised membership and send an invitation to a client you start from your dashboard and select 'Get Started'

On the next page select 'Create Personalised Membership'

Now you can select 'Build a membership' and then click 'Next: Client details'

You now put your clients details in and then click 'Next: Length of membership'

You now put in the length of the membership, how many months it goes for, for example if it goes for 12 months you would put 12.
You can also select if you want the membership to continue (auto-renew) after the term or you leave this unselected if you would like the membership to stop.
Once you have done this you select 'Next: Set start date'

You now select what date you would like membership to start on which can be any date from tomorrow.
You also have an option to allow your client to accept the membership after the start date you set, if you do not select this if your client does not sign up before the start date the invitation will expire.
Once you have done this you now select 'Next: Membership inclusions'

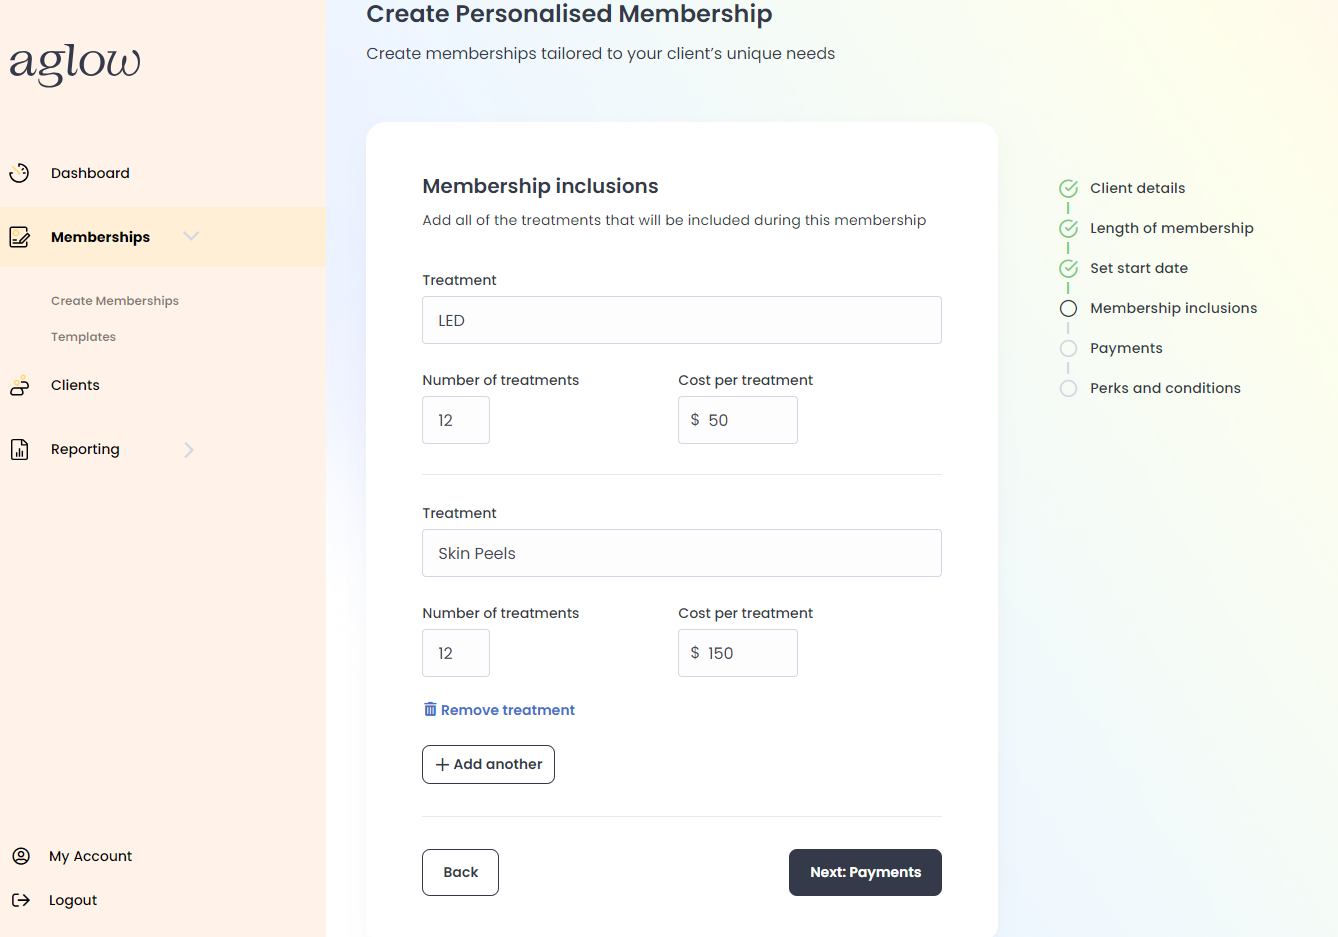
You can now add all the treatments that are included in this personalised membership.
You put in the Treatment, for this example = LED
You put in how many of these treatments are included, for this example = 12
You can put in the cost of that treatment, for this example = $50

To add another treatment you select the button '+ Add another'
I have now added Skin Peels as an inclusion as well, with 12 treatments and $150 per treatment
You can continue to add all the treatments that are included in this customised membership. Once you have finished adding all the treatments you select 'Next: Payments'

The built in calculator will formulate the desired payment option that best suits you and your client, weekly, fortnightly or monthly. As over 90% of aglow users pass the transaction fee on with our surcharge feature, we have this automatically selected for you. You can of course untick that box if you like and take on the transaction fee yourself.
Once you have made your selections you now select 'Next: Perks and Conditions'

You can now list all the perks and conditions that are in this membership, if you are after ideas, you can select 'Common perks and conditions' button which will then show the information to the right of common perks and conditions that are in beauty memberships

You can now add the relevant perks and conditions for this membership. Below is an example.
Once you are finished putting those in you select 'Review Membership'

You can now review the membership, if it all looks correct you select 'Send membership invite'

This will now instantly send your client a link via SMS and email to sign up to the membership.

